Kivy GUI Tutorial
-
Kivy is an easy to use and simple, cross platform python library for developing GUI applications.
Kivy can be used to create desktop applications that can run on Windows, Mac, Linux, iOS based devices, Android devices or any other touch enabled devices.Kivy has several built-in widgets(controls and layouts) that can be used to develop input/output based desktop applications or interactive games that require animations.
We will go through the basics of Kivy in subsequent sections with working examples. -
Contents
-
Kivy Installation
Download and install the latest version of python from Python Website if not already done.
Set up virtual environment.
Install Kivy using command python -m pip install kivy[base].
Kivy installation may some times throw an error message like Could not find a version that satisfies the requirement kivy_deps.sdl2_dev~=0.3.1 (from versions: 0.4.2, 0.4.3)
Refer next section to fix this error. -
Kivy Installation Error - Could not find a version that satisfies the requirement kivy_deps.sdl2_dev~=0.3.1 (from versions: 0.4.2, 0.4.3)
This issue is caused by the fact that the latest version of kivy is not optimized for the python version that is installed in our machines.
For example, at the time of writing this article, we had python 3.10.0 as the latest version in our machine and kivy version was 2.0.0 and this kivy version was throwing this error.
Fix is to download and use the 3.9.x (we can use the latest 3.9 version) of the python.
Follow the below steps for setting up and using kivy using Python 3.9.x.Navigate to the required folder in command prompt and set up virtual environment using below command and then activate the virtual environment.
For Windows:py -3.9 -m venv <EnvName>For Linux, macOS:python3.9 -m venv <EnvName>Then use below command for installation:
pip3.9 install kivy[base] -
To check if kivy installed successfully
Open interpretor by typing py (windows) or python (Mac/Linux)
Run below commands. If installation successful, we will get below output.import kivy print(kivy.__version__)Output:
2.0.0 -
Basic Kivy Application
Code provided in the below sample is the bare minimum for creating a kivy application.
First 2 lines import kivy and mention the current version.
A kivy application should have a class that inherits the App module and a build function within it. This class acts as a start-up. As seen in the last 2 lines, when the main function executes, this in turns calls the class that inherits the App module and executes the build function. In other words build function acts as a Page Load function. All the steps that should happen when the GUI opens, should be mentioned in the build function. Here we can create the window title, size, color, define the layout, add the required controls, etc.
Sample code given below. To run the code, copy this to a .py file and type py filename.py or python filename.py or py -3.9 filename.py or python3.9 filename.py as per the os and python version used.
Copiedimport kivy kivy.require('2.0.0') from kivy.app import App from kivy.uix.label import Label class FirstKivyApp(App): def build(self): return Label(text='This is my first Kivy App') if __name__ == '__main__': FirstKivyApp().run()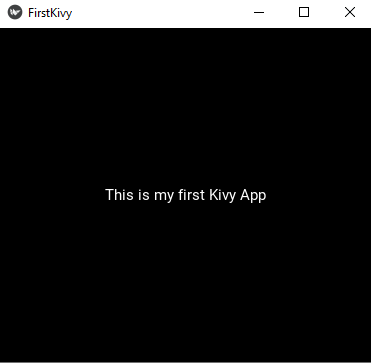
-
Window size, color and title
We can set up the size, background color of the window as below after importing Window module. Color values can be between 0 and 1 to obtain different colors. Code sample below:
from kivy.core.window import Window self.title = 'My First Kivy App' Window.clearcolor = (1, 1, 1, 1)#White Window.size = (500, 500) -
Kivy Widgets
Widgets can be considered as different types of controls provided by Kivy to get the desired look and feel inside a GUI window. Widgets are classified as follows:
UX WidgetsButton, Text, Label, Radio, Image, Video, Slider, ProgressbarLayoutsAnchor, Box, Float, Grid, Page, StackComplex UX widgetsDropdown, Popup, SpinnerWe will go through some of the common widgets used.
-
Button Widget
To use a button, import Button module of kivy.uix and then create object as below
    from kivy.uix.button import Button
    btn = Button(text='New Button')
An action can be bind to a button and different styles can be applied. Important properties are background_color, color, border, etc. Events are on_press, on_release, on_state(can be used to notify each time the state of button changes)
Sample code and output given below:Copiedimport kivy kivy.require('2.0.0') from kivy.app import App from kivy.uix.button import Button from kivy.uix.label import Label from kivy.uix.gridlayout import GridLayout class RDCalculator(App): def build(self): self.lblR = Label(text="") btn = Button(text ="Calculate") btn.bind(on_press = self.calculate) layout = GridLayout(cols=1) layout.add_widget(self.lblR) layout.add_widget(btn) return layout def calculate(self, instance): self.lblR.text = str("Calculation Done!!!") return if __name__ == '__main__': RDCalculator().run()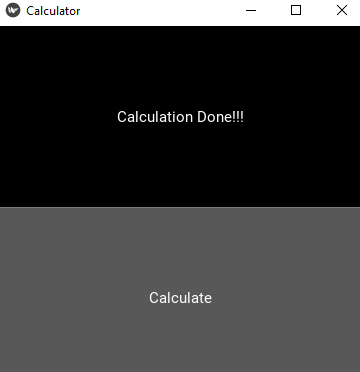
-
Label Widget
Used to hold a text. Created as:
from kivy.uix.label import Label lblR = Label(text="This is a Label") -
TextInput Widget
Used as a textbox that can accept values from user. Created as:
    from kivy.uix.textinput import TextInput
    txtI = TextInput(text='', font_size=12,multiline=False)
Use multiline property to create multiline textbox.
-
Checkbox and Radio Widget
Two state controls. Checkboxes when grouped becomes radio. Created as:
from kivy.uix.checkbox import CheckBoxUse active event to handle clicks.
Sample code and output given below:Copiedimport kivy kivy.require('2.0.0') from kivy.app import App from kivy.uix.button import Button from kivy.uix.label import Label from kivy.uix.checkbox import CheckBox from kivy.uix.gridlayout import GridLayout class CBApp(App): def build(self): cb1 = CheckBox() cb2 = CheckBox() cb1.bind(active=clickMe) layout = GridLayout(cols=2) layout.add_widget(cb1) layout.add_widget(cb2) return layout def clickMe(checkbox, value): print('Value is ', value) return if __name__ == '__main__': CBApp().run()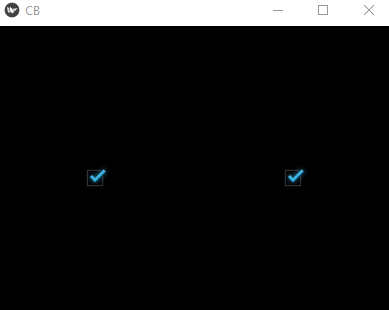
-
Image Widget
To display an image. By default displayed at center. To change, use allow_stretch or keep_ratio properties. Created as:
    from kivy.uix.image import Image

    img = Image(source='imagename.png')
    asimg = AsyncImage(source="http://url.com/imagename.png")
Third line creates an image that is loaded asynchronously so that application don't have to wait till image loads.
-
Video Widget
Used to display videos and streams.
    from kivy.uix. videoimport Video
    video = Video(source='testvideo.mpeg', state='play')
Main properties are duration, eos (True means video is finished), loaded(True means ready for playback), state(play, pause, stop), volume .
-
Kivy Layout Widgets
Kivy uses different layout widgets to align UX controls within the window. We will go through the 3 main layouts that can be useful. Following 2 properties are important for mentioning the size and position of widgets within layout.
size_hintDefines size of widgets as fraction of window size. Values ranges from 0 to 1pos_hintPosition relative to parent -
Kivy BoxLayout
Widgets arranged in a sequential manner, horizontal or vertical. Default is horizontal. Following code creates a box, which is of half the size and width of the window. 2 widgets are aligned horizontally within the box.
Sample code and output given below:
Copiedimport kivy kivy.require('2.0.0') from kivy.app import App from kivy.uix.boxlayout import BoxLayout from kivy.uix.label import Label from kivy.uix.button import Button class FirstKivyApp(App): def build(self): layout = BoxLayout(size_hint=(.5, .5)) btn = Button(text='Button', size_hint=(1, .4)) lbl = Button(text='Label', size_hint=(.5, 1)) layout.add_widget(btn) layout.add_widget(lbl) return layout if __name__ == '__main__': FirstKivyApp().run()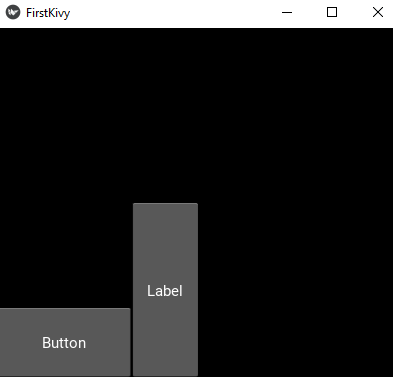
Important properties of BoxLayout are minimum_height, minimum_width, orientation, padding (space between box and widgets within) and spacing (space between widgets) .
-
Kivy GridLayout
Allows you to arrange widgets as rows and columns. Below code defines a grid with 3 columns. When we add widgets, it will get added to the cells in mentioned order. When a fourth widget is added, second row is automatically created and widget placed there.
Sample code and output given below:
Copiedimport kivy kivy.require('2.0.0') from kivy.app import App from kivy.uix.gridlayout import GridLayout from kivy.uix.label import Label from kivy.uix.button import Button class FirstKivyApp(App): def build(self): layout = GridLayout(cols=3) btn1 = Button(text='Button 1') lbl1 = Button(text='Label 1') lbl2 = Label(text='Label 2') btn2 = Button(text='Button 2') layout.add_widget(btn1) layout.add_widget(lbl1) layout.add_widget(lbl2) layout.add_widget(btn2) return layout if __name__ == '__main__': FirstKivyApp().run()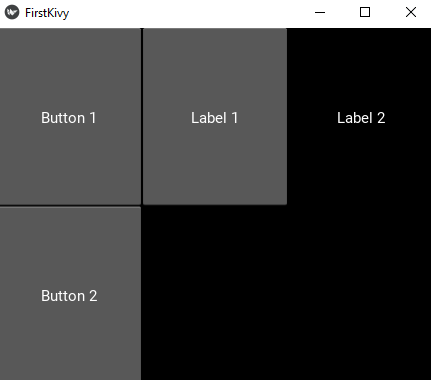
Main properties are col_default_width, col_force_default(If True, col_default_width is used instead of width and size_hint properties), cols, minimum_height, minimum_width, orientation(default from left to right, top to bottom (lr-tb). Allows 8 different combinations like tb-lr), padding, spacing .
-
Kivy AnchorLayout
Aligns widgets at top, bottom, left or right. See samples below.
    layout = AnchorLayout()
    btn = Button(text='Button at center')
    layout.add_widget(btn)

    layout = AnchorLayout(anchor_x='right')
    btn = Button(text='Button at center right')
    layout.add_widget(btn)

    layout = AnchorLayout(anchor_x='left', anchor_y='top')
    btn = Button(text='Button at top left')
    layout.add_widget(btn)
Main properties are anchor_X, anchor_y, padding .
-
Colspan in Kivy – Combine multiple layouts
GridLayout doesn't have colspan feature. We can combine different layouts to get the desired structure. The below example combines grid and box layout to get 2 items in first row and one item in second row.
The below example combines grid and box layout to get 2 items in first row and one item in second row.
Copiedimport kivy kivy.require('2.0.0') from kivy.app import App from kivy.core.window import Window from kivy.uix.gridlayout import GridLayout from kivy.uix.boxlayout import BoxLayout from kivy.uix.textinput import TextInput from kivy.uix.button import Button class FirstKivyApp(App): def build(self): Window.clearcolor = (.3,.5, 1, 1) txt1 = TextInput(text='First Textbox') txt2 = TextInput(text='Second Textbox') blayout = BoxLayout(padding=20, spacing=10) blayout.add_widget(txt1) blayout.add_widget(txt2) glayout = GridLayout(cols=1, padding=50) glayout.add_widget(blayout) btn = Button(text='Button', size_hint=(1, 1)) glayout.add_widget(btn) return glayout if __name__ == '__main__': FirstKivyApp().run()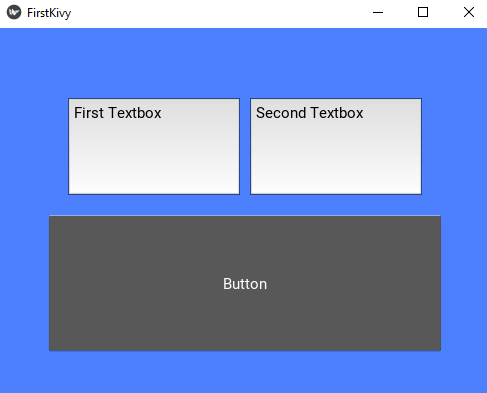
-
Applying style to widgets
We have 3 option to apply style to widgets. Using markups, comma separated values or KV language.
See the example below which has 3 labels using different style options.Copiedimport kivy kivy.require('2.0.0') from kivy.app import App from kivy.uix.label import Label from kivy.uix.gridlayout import GridLayout from kivy.core.window import Window from kivy.lang import Builder lblKVLang = Builder.load_string(""" Label: text: "KV Lang Style" font_size: '25' color: "#00f2f3" """) class TestApp(App): def build(self): lblM = Label(text='[b][color=#ff00ff]Markup Style[/color][/b]', markup = True) lblA = Label(text="Attribute Style", color =(0, 0, .5, 1), font_size ="15sp", size_hint=(1.0, 1.0)) lblK = Label() layout = GridLayout(cols=1) layout.add_widget(lblM) layout.add_widget(lblA) layout.add_widget(lblKVLang) return layout if __name__ == '__main__': TestApp().run()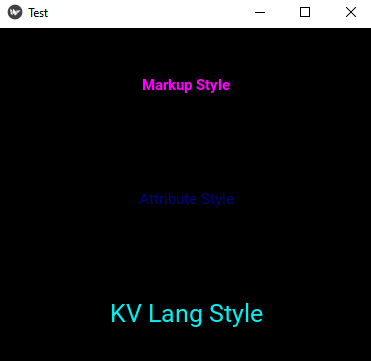
-
KV Language
We have placed KV Language tutorial in a separate page since it contains multiple sections. Won't take much time to understand the concepts. Have a look.
-
Kivy Samples
