Python Flask Tutorial
-
Flask is a web application framework written in Python. Flask can be used to develop light weight web applications entirely in Python. Compared to other web application frameworks, flask is simpler and easier to understand and is best for beginners. Flask depends some other libraries like Werkzeug and Jinja2 as well, which comes auto-installed on flask installation.
Werkzeug sets up the server for flask application.
Jinja2 is basically a template engine that helps in serving the html to the user.
In this tutorial, we will cover the Flask framework basics and its usages. With the help of simple code snippets, explain setting up the first html page, making HTTP requests, etc and also some CRUD sample links for different databases. -
Contents
-
Flask Installation
Download and install the latest version of python from Python Website if not already done.
Setting up virtual environment is not a must. But this is a best practice when working on python projects. Click virtual environment for more details.
Install Flask using command pip install flask
Run pip freeze to check if flask installed successfully. Should give an output like this.
click==8.0.3 colorama==0.4.4 Flask==2.0.2 itsdangerous==2.0.1 Jinja2==3.0.3 MarkupSafe==2.0.1 Werkzeug==2.0.2 -
Minimal Flask Application
For the bare minimum, a Flask application should have the below content.
from flask import Flask

myfirstapp = Flask(__name__)

if(__name__ == "__main__"):
    myfirstapp.run()
This code imports FlaskFlask module and creates an object myfirstapp of Flask class. Last 2 lines serves as the entry point of the app and starts the server.
You can save the the above content to a file and run it using command python filename.py. We will get the below message if no error is there.
    * Serving Flask app 'carsales' (lazy loading)
    * Environment: production
    WARNING: This is a development server. Do not use it in a production deployment.
    Use a production WSGI server instead.
    * Debug mode: off
    * Running on http://127.0.0.1:5000/ (Press CTRL+C to quit)
Copy the URL http://127.0.0.1:5000/ to your browser and run. We will get the Not Found message as below.
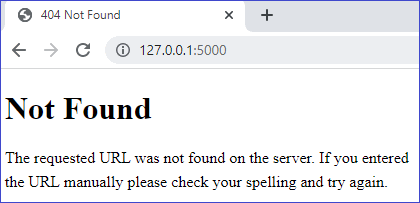
This means that the Flask has handled the server set up and our application is ready. We will now have to set up our html pages and routing to handle page navigations.
-
Setting up first web page
In Flask, all our HTML should be placed inside a folder named templates. Create this folder and add html file firstpage.html inside templates.
Add below code to firstpage.html. We also need a python file to handle the Flask code. Create a file named firstpage.py and add below code.
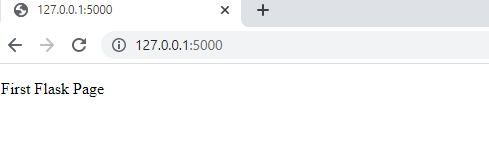
In command prompt. click Ctrl + C to stop the application and run command python firstpage.py. This process is to be done each time we make any changes and want to reload the page. Some times, after stopping flask web from command prompt, just reloading the html will not give you the desired output. If any such issues are faced, close the web page and reopen.
On browsing the URL, we will get below output window.
-
Rendering HTML content
We can directly return the html content from python code as below.
@myfirstapp.route("/")
def main():
    return "<html><body><p>This is without an html page</html></body></html>"
Or we can use the render_template function to return an html page available in the template folder. We have to import it before using.
from flask import Flask, render_template myfirstapp = Flask(__name__) @myfirstapp.route("/") def main(): return render_template("firstpage.html") -
Send data from python code to HTML pages
We can pass data from python to html as a parameter of render_template function. Code sample below.
@myfirstapp.route("/")
def main():
    testData = 'This is test data from python to html'
    return render_template("firstpage.html", td = testData)
Place content inside double curly braces to display data as below.
<label>{{td}}</label>If multiple items are there we can keep it as a model an pass it.
-
Add python code in HTML pages
We can add python code directly in our html pages using {% #code here %}. See below sample that has a for loop to list some data.
@myfirstapp.route("/")
def main():
    planets = ['Mercury', 'Venus', 'Earth', 'Mars']
    return render_template("firstpage.html", planets = planets)
<table class="table"> <thead><tr><th scope="col">Planets</th></tr></thead> <tbody> {% for planet in planets %} <tr><td>{{ planet }}</td></tr> {% endfor %} </tbody> </table> -
Routing in Python Flask
We can define routes in the python file as below. Add the route name and a function just below it to handle the code associated. route("/") is the default one, if no path is mentioned. We an add optional parameters to routes by placing those inside < >>. Route secondpage includes an optional parameter id in below sample.
@myfirstapp.route("/") def main(): planets = ['Mercury', 'Venus', 'Earth', 'Mars'] return render_template("firstpage.html", planets = planets) @myfirstapp.route("/secondpage<int:id>") def addcar(): return render_template("secondpage.html") -
Redirect to another page
In some scenarios, it may be required to redirect to another page after some task. Achieve this using the redirect function. This has to be imported as well.
from flask import Flask, render_template, redirect #Some other code @myfirstapp.route("/") def main(): planets = ['Mercury', 'Venus', 'Earth', 'Mars'] return render_template("firstpage.html", planets = planets) return redirect('/secondpage') -
Using Static Files
To use static files such as css and javascript we have to place those in a folder named static. Create it and add the static files here.
-
HTTP Methods
Different HTTP protocols are supported by Flask.
GETGet data from serverPOSTPost form data to serverPUTMainly used to update dataDELETEUsed to delete some dataWe can define methods to handle various protocols using methods parameter when we name the route. Using request.method, we can itentify protocol. Use request.form["tstValue"] to read data from controls. Sample below:
In command prompt we should be able to see the below results when page loads or data submitted.
First page loaded
127.0.0.1 - - [06/Dec/2021 15:48:02] "GET / HTTP/1.1" 200 -
Value entered in textbox is 'This is test'
127.0.0.1 - - [06/Dec/2021 15:48:08] "POST / HTTP/1.1" 302 -
-
Request Object
As seen the above section request object can be used to identify the HTTP protocol, read submitted form value, etc.
-
Use JSON Data in Flask Web App
We can connect to JSON data from our Flask web application and read and write data. Refer to this sample on how to handle JSON operations.
-
Flask Web App with different databases
Below are CRUD samples of Flask with different databases.
