How to set up Firebase database for the first time
-
Firebase Realtime Database is a cloud-hosted database provided by Google. Firebase doesn't use SQL to query the database and data is stored in the form of JSON. Web applications can use Firebase as the back-end database and Firebase has many advantages including offline access.
Initial set up of Firebase database can be a bit challenging for new users. To use a Firebase Database in your web application, a database URL and a configuration file with the service account details are needed. This article covers the step-by-step process of configuring Firebase, create a realtime database and to generate the service account configuration file. After this, you can use these details in your web applications written in Python, NodeJS, etc.
-
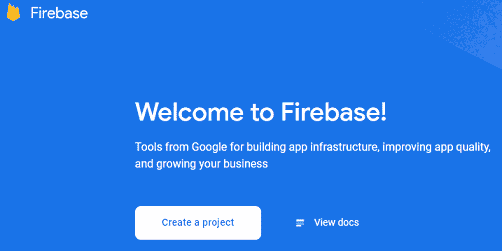
Open Firebase console
Using your Google account login to the Firebase console.
-
Create a Project
A Firebase project is a Google Cloud project and acts as a container for Apple, Android or Web apps and will share features like Database, User Management, etc. In this article, we are going to configure and use the Firebase realtime database only.
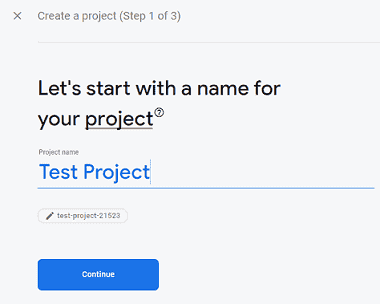
In the console home page, you will find an option to Create a Project. Click on it.
Provide the Project name as Test Project and click on Continue.
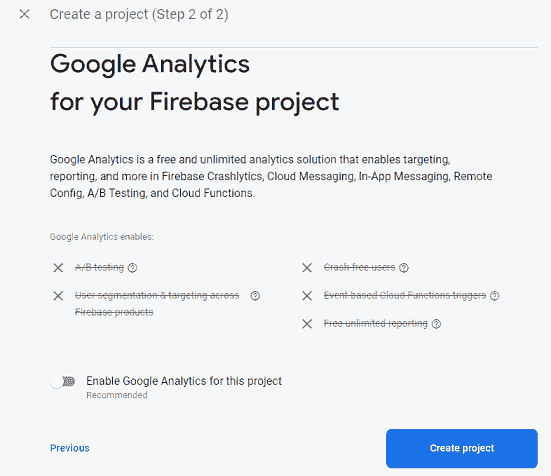
Disable the Google Analytics option as this is a sample project. Then click on the Create project button.
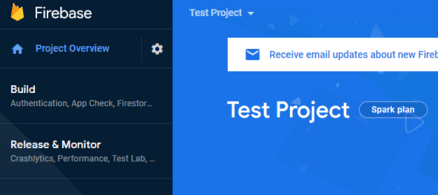
New project is now created and is displayed in the Firebase home page as below. From the drop down at the top, we can manage different projects.
-
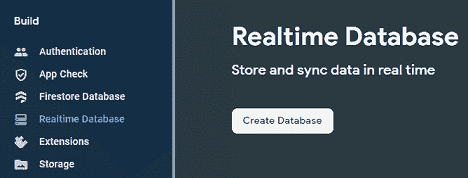
Create Realtime Database
Next step is to create a new realtime database under the Firebase project that we have created.
Expand the Build menu. Click on Realtime Database sub-menu and then the Create Database button.
Choose the database location and click on Next button.

Select Start in locked mode option and click on Enable button.
This option should be selected if you are working on actual projects. All third party reads and writes will be denied by default, if this option is selected. We will continue with this option for our sample as well.
Note that, if Start in test mode option is used, anyone with your database reference can view, edit and delete all data in the database for the next 30 days.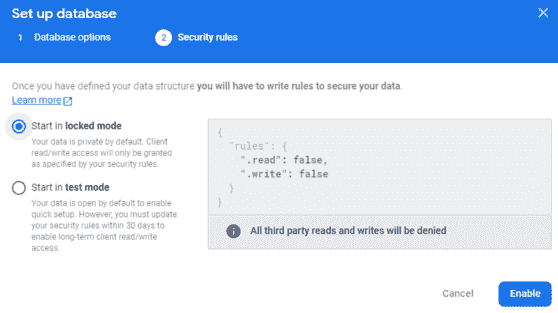
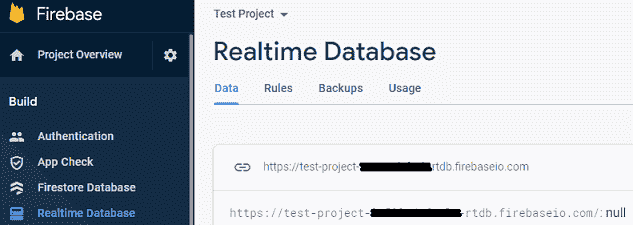
Database is created now. The URL displayed in the screen can be copied and used in our web or mobile application code.
-
Generate Firebase Service Account JSON file
Firebase Service Account file contains the private key that is required to authenticate our project on the Google Cloud servers. This file stores data in JSON format. We have to download this JSON file and refer this file in our code to complete the authentication. Let us go through the process.
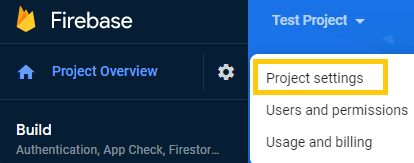
Click on the Settings icon at the top left of the screen next to Project Overview link. Then click on the Project settings link.
Now the Project settings page is displayed. Go to the Service accounts tab and click on Generate new private key button. A new Firebase Service Account JSON file is generated with the private key stored in it.
This private key gives access to our project's Firebase services including the database. This has to be kept confidential and never store this file in a public repository. The file can be renamed and stored in a secure location to access from our web or mobile application code.
Sample codes to access this file is also provided here.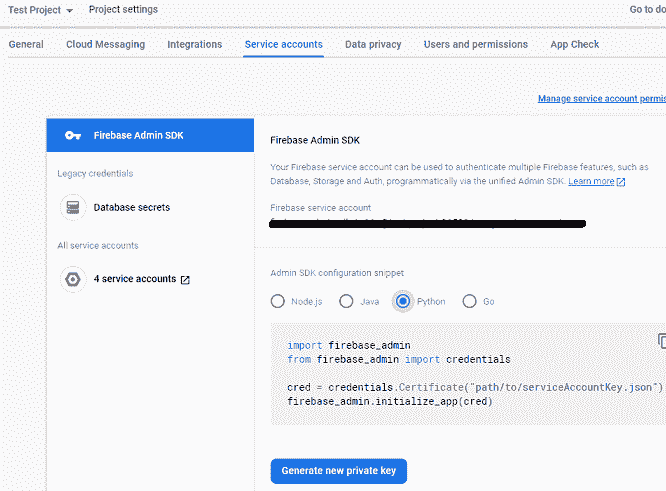
-
Python Web Application Samples using Firebase Database
